 for a better
  look.
look.
 for a better
  look.
look.
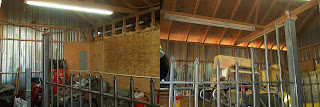
 r panels that we are going to build. Two of the panels are going to bolt together to make the thirty two foot run that starts
 at the corner and runs up to the walkway, another panel will run between the
 walkway and the driveway, and the panel that you see in the picture is going to run from the driveway to the property line. Please click on the pictures for a closer look.